My Sister’s Amazing Sandwich Rolls

My sister is a pastry chef, and she is REALLY great at baking. Everything she bakes is amazingly good. She happens to be a wonderful cook as well. Today I’m posting her recipe for Israeli sandwich rolls. These rolls are the kind we used to buy every morning at the grocery store when we were kids in Israel and made sandwiches to take to school. Soft and slightly chewy, and always so fresh…I’m not sure if you can find these rolls in the U.S. I haven’t seen any in all the years I’ve been living here.

Ingredients:
1 kg (2 lb) all-purpose flour
2 tbs dry active yeast or 50g baker’s yeast
5 tbs sugar
1/3 cup oil
2 cups lukewarm water
1 tbs salt
1 egg for egg wash (optional)

Preparation:
In a mixer bowl equipped with the hook attachment mix the flour, sugar and dry yeast.

If using baker’s yeast, dissolve the yeast in ½ cup of lukewarm water. Let it develop for 5 minutes. Add it with the liquid in the next stage.

While the motor is running, gradually add 2 cups water (or 1 ½ water and the yeast mixture if you used ½ cup water for the yeast) and oil. Add the salt at the end and continue kneading for 7-10 minutes, until the dough detaches from the walls of the mixing bowl, but still sticks to the bottom.

Place the dough in a lightly greased bowl, cover with a clean towel, and proof in a warm place until it doubles in volume.

Preheat oven to 350F.

Remove the dough from the bowl and place on a work surface lightly floured.

Punch the dough a few times to deflate it and divide it into 16 equal pieces.

Roll each piece of dough into a 10-inch-long rope and tie it in a knot.

Place knots on a baking sheet covered with baking paper and space them out, leaving 4 inches between knots. Cover with a towel and proof again until knots double their size.

Bake in a 350F oven for 20 minutes.

Homemade Hamburger Rolls

This 4th of July you don’t need to settle for store bought hamburger buns. Here is a recipe that is very easy to make and is ten times better, flavor and nutrition wise, than the store bought buns.

My sister in Israel is the source for this great hamburger roll recipe. When it comes to baking she is my ultimate expert. She is actually a legit pastry chef (and a really amazing one) who graduated from the Cordon Bleu in Paris. So when she finds or develops a good recipe for breads and baked goods I have to have it.

I call these rolls hamburger rolls because this is how everybody knows them by but, really, you can eat them with anything. We do not eat meat at home, yet we get to enjoy these rolls pretty often with our favorite spreads or with a good homemade bean burger (in the picture) or other yummy concoctions. 

IMG_7442

Enjoy your burger and have a happy 4th of July!

Ingredients:
2 tbs dry active yeast
5 tbs sugar
2 lb all-purpose flour
2 cups lukewarm water
2 eggs, lightly beaten
2 tsp salt
1/2 cup oil

Preparation:
In a mixer bowl equipped with the hook attachment mix the flour, sugar and dry yeast.

While the motor is running, gradually add 2 cups water, the eggs, salt, and eventually the oil. Continue kneading for 7-10 minutes, until the dough detaches from the walls of the mixing bowl, but still sticks to the bottom.

Place the dough in a lightly greased bowl, cover with a clean towel, and proof in a warm place until dough doubles in volume.

Preheat oven to 350 F.

Remove the dough from the bowl and place on a lightly floured work surface.

Punch the dough a few times to deflate it and divide it into 16 equal pieces.

Roll each piece of dough into a ball and place on a baking sheet covered with baking paper. Space the buns out, leaving 4 inches between them. Cover with a towel and proof again until the buns double their size.

Brush the top of the rolls with some water and sprinkle your favorite topping (sesame, everything, salt, poppyseed…) 

Bake in a 350F oven for 20-25 minutes, until rolls are nicely browned.

IMG_7438IMG_7436

Middle Eastern Herb Omelet

If you are following my blog, you may have already noticed by now that herbs and greens are used abundantly in Persian cuisine, and in addition to being cooked, they are also consumed raw as accompaniment to cooked food.

One very simple dish that is unbelievably delicious is khagineh, or herb omelet, which is eaten as part of a light meal, and is traditionally served with good rustic bread or pita, yogurt and fresh vegetables.

Iraqi and Kurdish Jews in Israel also make this herb omelet, known in Kurdish, Iraqi, and Arabic by the name of Idjeh. In Israel you can come across this omelet served in a pita in some of the street food eateries, usually served with tahini, tomato, and pickles. Yum!!

In addition to making herb omelet at home every once in a while, it became one of the dishes we always make on Passover. It was traditionally eaten in my family during Passover and my mother loved using a wet matzah to make a sandwich roll with the omelet. So that’s how I eat it.

Ingredients:
1/3 cup oil
1 medium onion, diced
4 cups chopped fresh herbs of choice (green onions, parsley cilantro, basil. dill, mint, etc.)
8 eggs
Salt and pepper

Preparation:
Heat the oil in a large pan. Add the onion and sauté until golden.

Add the chopped herbs and sauté for 5 minutes.

In a bowl, whisk the eggs with salt and pepper. Pour the eggs on the sautéed herbs, cover the pan with a lid and cook for 2-3 minutes.

Remove the lid, place a large tray over the pan and turn the pan upside down to transfer the omelet to the tray. Place the pan back on the stove and slide the omelet back. Cook for 1-2 more minutes and transfer to the serving tray.

The Best Peanut Butter and Jelly Sandwich

So now, with Thanksgiving behind us, well…almost…, I just want to eat light. Not so much diet wise, but more things that do not require heavy cooking. You know how sometimes you want something good to eat that’s not “food”? Today, after lunch, I had this unsatisfied feeling (although I enjoyed my lunch) that made me walk around the kitchen opening all the cabinets in search of something delicious that would calm me down.

This is, by the way, a recipe for disaster if you are trying to be on a diet. Anyway, I found in the fridge some plum jelly that I made about a month ago, and I planned on eating some with a spoon. But then, out of the corner of my eyes I caught a piece of pita bread that I left on the counter this morning (in a plastic bag, of course). As I was spreading the jelly in the pita, I recalled seeing a container of natural salted peanut butter in one of the cabinets. So I added that too.

Now, I must confess. Peanut butter and jelly sandwich was never one of my favorites. In fact, I am usually dismissive of it, because I’m a health food freak, and the original ingredients in this sandwich rub me the wrong way. Think about it. Artificially flavored, sugar-packed grape jelly, commercial peanut butter that has all kinds of hydrogenated oils and sugar in addition to peanuts! And that white, spongy bread…can it even be called bread?

But somehow the thought of real bread with the homemade jelly that’s made of just fruit and sugar (and not too sweet), and the saltiness of the freshly ground peanuts, made my mouth water.

And you know what? It was really gooooood!

So I guess I owe my fellow Americans an apology for dismissing the legendary, all-American, peanut butter and jelly sandwich. Or maybe I owe just half an apology.  After all, I had to figure out the right ingredients myself.

Tuna Salad, a Little Different

Tuna salad is one of the foods I like to have in the fridge on a regular basis. It goes well as the protein portion of a meal when we are too lazy, too tired, or too hungry to cook something. It also goes great on a sandwich or in a salad. And now, that school is back in session, we will be making it even more often as it is one of my son’s favorite sandwich options.

But eating always the same thing can get a little boring, so we try different spice and ingredient combinations to give the tuna salad a fresh twist. Here are a few of variations we like to make:

The common American tuna salad, as you may know, calls for canned white tuna in water, mayonnaise and celery. We don’t usually love white tuna in water because it’s very dry and not so flavorful. But thanks to the mayo added in here, it actually tastes really good. Just don’t go overboard with the mayo, because then you’ll only taste the mayo and nothing else. Try to be generous with the celery, though. It lightens up the salad and freshens it.

Another tuna salad I like to make uses canned dark tuna in olive oil (also known as Italian tuna), thinly chopped onion, chopped parsley, fresh lemon juice, very little mayo (enough to ‘glue’ the ingredients together), salt and black pepper. Very simple, very easy, and very refreshing! Tuna goes very well with lemon!!

One of my son’s favorite variations is what he calls the Israeli tuna salad, which consists of canned dark tuna in olive oil, chopped onion, sweet corn kernels from a can, chopped Israeli pickles (dill pickles will do, if you can’t find the Israeli ones), and a little mayonnaise.

As school has just started a couple of weeks ago, I needed to make sure there was food to take, so I opened three tuna cans and started making the Israeli tuna salad. Only instead of regular onion, I chopped some scallions, and instead of opening a can of Israeli pickles, I used some pickled muffaletta olive salad that we had already open in the fridge. It came out a little different, obviously, but not less yummy. In fact, we just had it for dinner and enjoyed the combination of flavors so much that I got inspired to write this post and let you all know that you should try it too.

I do not usually measure my ingredients, I do it by eye, and I taste to adjust the flavors. So there is no recipe this time, just the list of ingredients above. Have fun playing with it and be creative. And if you come up with some other fun combinations, I would love it if you shared them with me.

Homemade Corn Tortillas

When we go out to eat, we’re always on the look-out for small Mom and Pop, hole-in-the-wall places where the food is authentic and usually of a much better quality than the big chains. However, unfortunately for us, although we may very much enjoy the meal, we can’t stop thinking that we could easily make some of the dishes at home and they would taste just as good. And when we try at home, and the dish actually comes out the way we like them, we don’t feel the need to eat out anymore (unless I don’t feel like working). Sometimes it feels like shooting myself in the foot…

When it comes to Mexican food, which we all love, there are some staples that we’ve already mastered at home, such as guacamole, salsa, and pico de gallo, and our own bean, fish, and meat fillings for tacos. Thank God there is so much more to Mexican food than just tacos. It gives us a reason to leave the house and enjoy other dishes that we don’t make at home. Until recently, the only obstacle to having our own perfect taco dinner at home were good corn tortillas. All the store-bought corn tortillas I’ve tried aren’t as good as the tortillas you get at decent Mexican restaurants. So I decided to try and make corn tortillas at home.

I prepared in advance for making tortillas at home and picked a day when I wasn’t super busy, thinking it would be a big project. But it wasn’t. I used Bob’s Red Mill masa harina, and followed the recipe on the back of the bag. It was so easy to make and we enjoyed it so much, that I have decided to make it more often.

I made a double batch, planning on freezing or refrigerating some of the tortillas for another time, but before I knew it, they were all gone. Even my youngest son, who would not touch store bought tortillas, had three of them and asked for more. Success!

Just a side note – when I tried to make tortillas again, I bought masa harina at a Mexican grocery, thinking that it would probably taste better than Bob’s Red Mill. I was wrong. Not only didn’t it taste better, but also it was stickier and harder to work with. So I’m back to Bob’s Red Mill. The recipe here works for this flour. If you buy masa harina of a different brand, follow the instructions on the package instead, for best results.

Corn Tortillas – makes 12 tortillas

Ingredients:
2 cups Golden Masa Harina Corn Flour
1/2 tsp Sea Salt
1-1/2 to 2 cups Hot Water

Preparation:
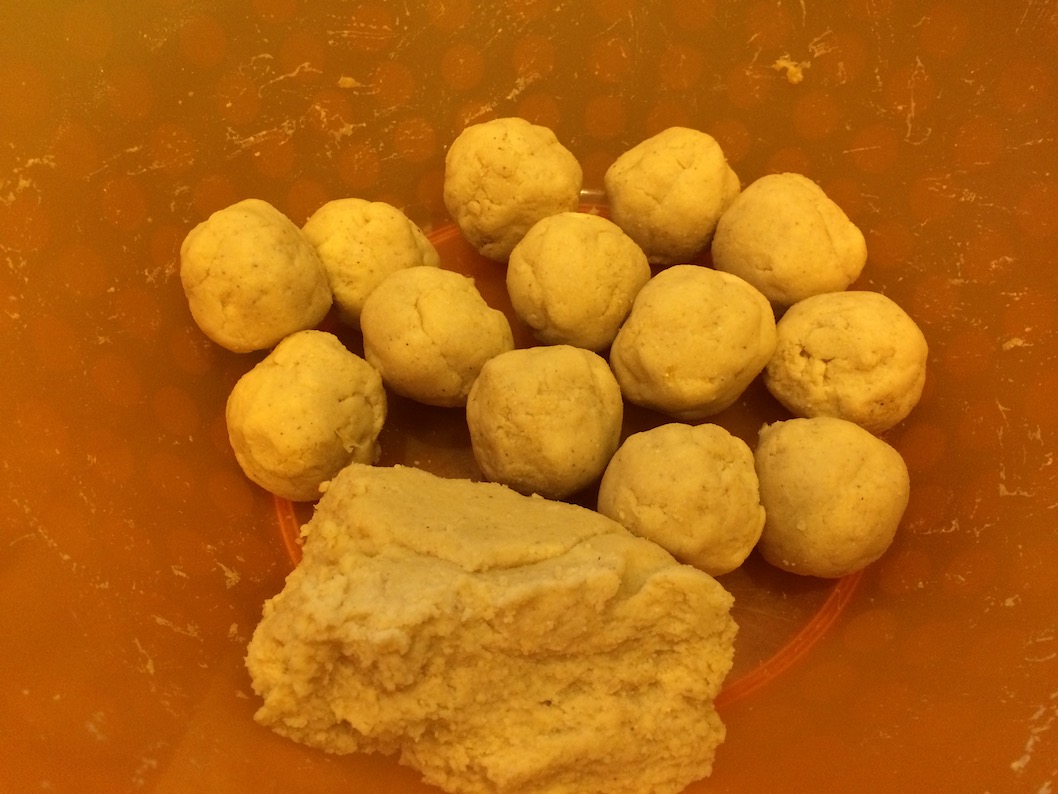
Mix salt into the masa harina corn flour. Slowly pour the water into the dough to get a good consistency. The dough should be firm and springy when touched, not dry or sticky. Let rest for about an hour, covered.

tortilla balls

Preheat a griddle or a cast iron pan. Divide the dough into 2 inch balls.

Press each dough ball between two pieces of waxed paper. You can either use a tortilla press, or if you do not have one, use a heavy skillet or a heavy dish instead. Just make sure that your ball of dough is placed between two pieces of wax paper so that it doesn’t stick to the dish or the work surface.

tortilla flattening

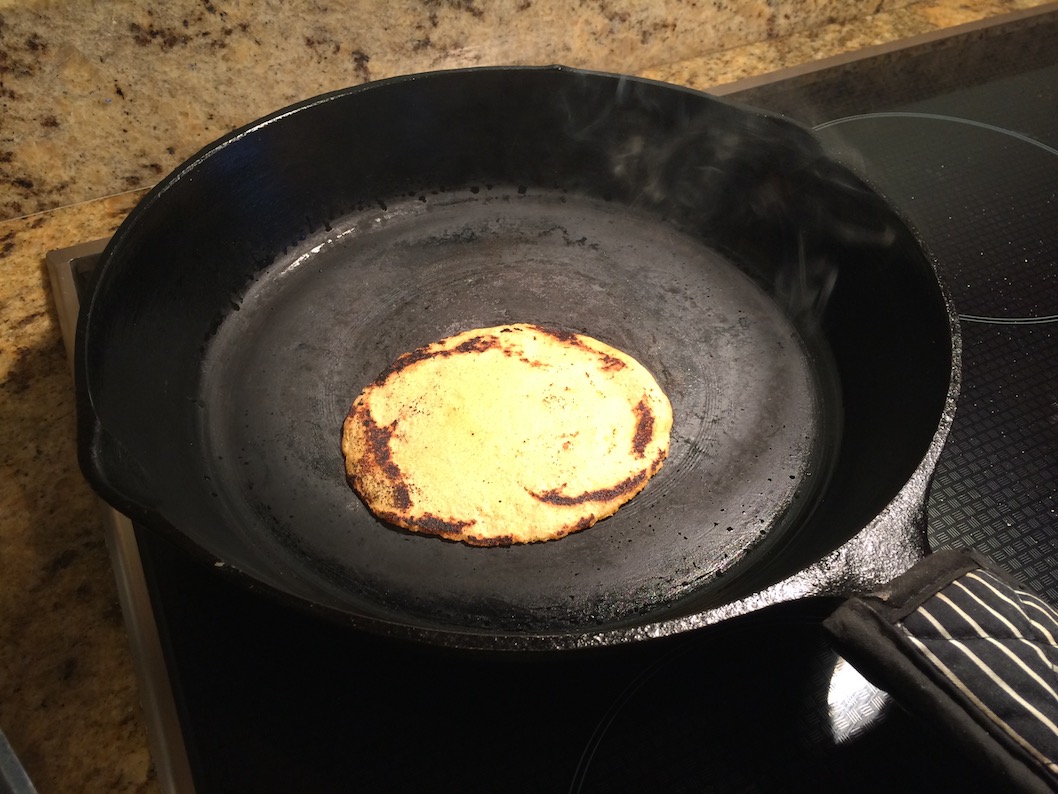
Place the flattened dough on a hot griddle or in a heavy pan, and cook until the top of the tortilla starts to look cooked, about 30-45 seconds. Flip to the other side and heat for a few seconds.

tortilla cooking
tortilla pile

Pile the tortillas on a plate, and cover with a towel. Serve them warm with your favorite variety of fillings such as grilled fish, sautéed ground beef, refried beans, guacamole, pico de gallo, etc. Corn tortillas tend to dry very quickly, so you should eat them while they are still fresh and warm, or place them in a sealed bag and freeze.