My Sister’s Amazing Sandwich Rolls

My sister is a pastry chef, and she is REALLY great at baking. Everything she bakes is amazingly good. She happens to be a wonderful cook as well. Today I’m posting her recipe for Israeli sandwich rolls. These rolls are the kind we used to buy every morning at the grocery store when we were kids in Israel and made sandwiches to take to school. Soft and slightly chewy, and always so fresh…I’m not sure if you can find these rolls in the U.S. I haven’t seen any in all the years I’ve been living here.

Ingredients:
1 kg (2 lb) all-purpose flour
2 tbs dry active yeast or 50g baker’s yeast
5 tbs sugar
1/3 cup oil
2 cups lukewarm water
1 tbs salt
1 egg for egg wash (optional)

Preparation:
In a mixer bowl equipped with the hook attachment mix the flour, sugar and dry yeast.

If using baker’s yeast, dissolve the yeast in ½ cup of lukewarm water. Let it develop for 5 minutes. Add it with the liquid in the next stage.

While the motor is running, gradually add 2 cups water (or 1 ½ water and the yeast mixture if you used ½ cup water for the yeast) and oil. Add the salt at the end and continue kneading for 7-10 minutes, until the dough detaches from the walls of the mixing bowl, but still sticks to the bottom.

Place the dough in a lightly greased bowl, cover with a clean towel, and proof in a warm place until it doubles in volume.

Preheat oven to 350F.

Remove the dough from the bowl and place on a work surface lightly floured.

Punch the dough a few times to deflate it and divide it into 16 equal pieces.

Roll each piece of dough into a 10-inch-long rope and tie it in a knot.

Place knots on a baking sheet covered with baking paper and space them out, leaving 4 inches between knots. Cover with a towel and proof again until knots double their size.

Bake in a 350F oven for 20 minutes.

Homemade Hamburger Rolls

This 4th of July you don’t need to settle for store bought hamburger buns. Here is a recipe that is very easy to make and is ten times better, flavor and nutrition wise, than the store bought buns.

My sister in Israel is the source for this great hamburger roll recipe. When it comes to baking she is my ultimate expert. She is actually a legit pastry chef (and a really amazing one) who graduated from the Cordon Bleu in Paris. So when she finds or develops a good recipe for breads and baked goods I have to have it.

I call these rolls hamburger rolls because this is how everybody knows them by but, really, you can eat them with anything. We do not eat meat at home, yet we get to enjoy these rolls pretty often with our favorite spreads or with a good homemade bean burger (in the picture) or other yummy concoctions. 

IMG_7442

Enjoy your burger and have a happy 4th of July!

Ingredients:
2 tbs dry active yeast
5 tbs sugar
2 lb all-purpose flour
2 cups lukewarm water
2 eggs, lightly beaten
2 tsp salt
1/2 cup oil

Preparation:
In a mixer bowl equipped with the hook attachment mix the flour, sugar and dry yeast.

While the motor is running, gradually add 2 cups water, the eggs, salt, and eventually the oil. Continue kneading for 7-10 minutes, until the dough detaches from the walls of the mixing bowl, but still sticks to the bottom.

Place the dough in a lightly greased bowl, cover with a clean towel, and proof in a warm place until dough doubles in volume.

Preheat oven to 350 F.

Remove the dough from the bowl and place on a lightly floured work surface.

Punch the dough a few times to deflate it and divide it into 16 equal pieces.

Roll each piece of dough into a ball and place on a baking sheet covered with baking paper. Space the buns out, leaving 4 inches between them. Cover with a towel and proof again until the buns double their size.

Brush the top of the rolls with some water and sprinkle your favorite topping (sesame, everything, salt, poppyseed…) 

Bake in a 350F oven for 20-25 minutes, until rolls are nicely browned.

IMG_7438IMG_7436

Spiced Apple and Orange Bread Pudding

A few days ago, I discovered a forgotten raisin challah deep in my freezer. I looked at it and thought that it could be really good for bread pudding because of the raisins. I don’t usually make bread pudding at home. Not that I don’t like it, but it is not one of these dishes that come to mind when I have leftover bread. We usually use the leftover challah (if we even have anything left) to make French toast or grilled cheese sandwiches.

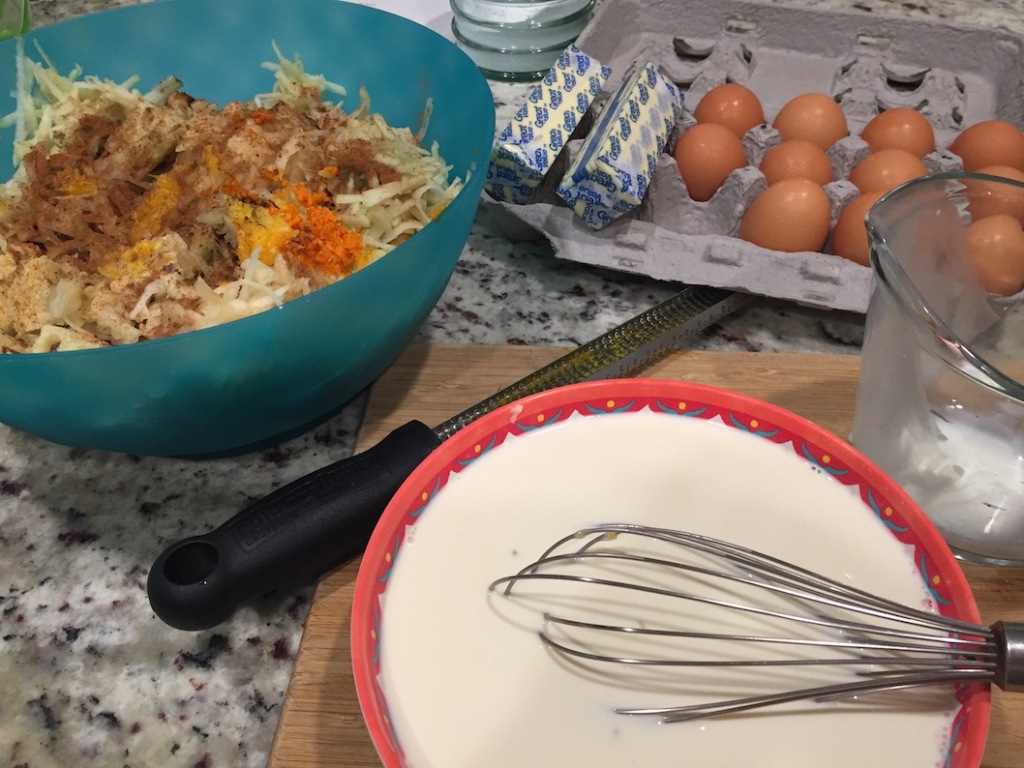
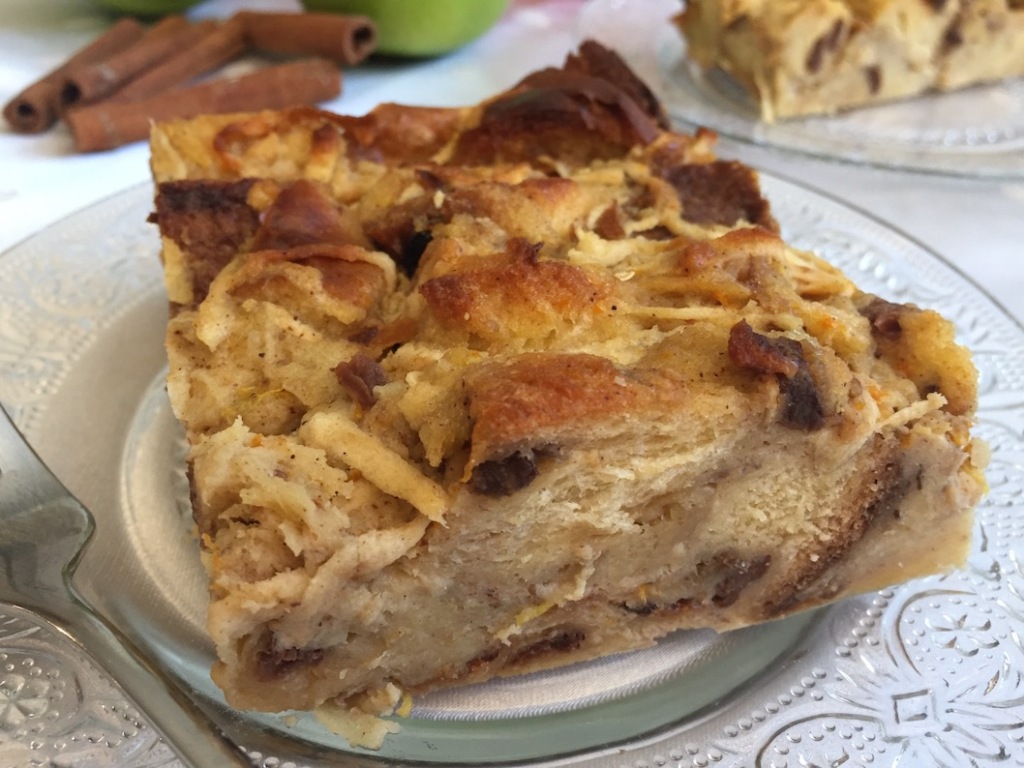
This time, it was destined to become bread pudding. I looked up some recipes for general guidance, and then I looked in my fridge to see what I wanted to add. I found an orange that had been there forever and needed to be redeemed and a couple of apples that I thought would add some nice autumnal flavor. I also added some spices, to make it interesting. Eventually, I collected more ingredients than I actually ended up using (the butter in the pics never made it in the pudding). I guess my recipe can be considered a leftover dish since I used, in addition to the old challah, an orange that had seen better times, and 3 egg whites that were left over from eggs used for another dish. However you look at it, I think I winged something that came out pretty good, and I hope you like it, too.

Ingredients:
1 raisin challah bread, cubed
2 apples, peeled and shredded
1 orange, zested and juiced
½ cup sugar
½ tsp ground cinnamon
½ tsp ground nutmeg
¼ tsp ground clove
¼ tsb ground cardamom
3 egg whites
2 eggs
1 cup milk
1 cup heavy cream
1 tbs butter, for greasing

Preparation:
In a large bowl, combine the cubed challah, shredded apples, zest from the orange, sugar, and spices.

In a separate bowl, mix the eggs with the milk, heavy cream, and orange juice (including the pulp).

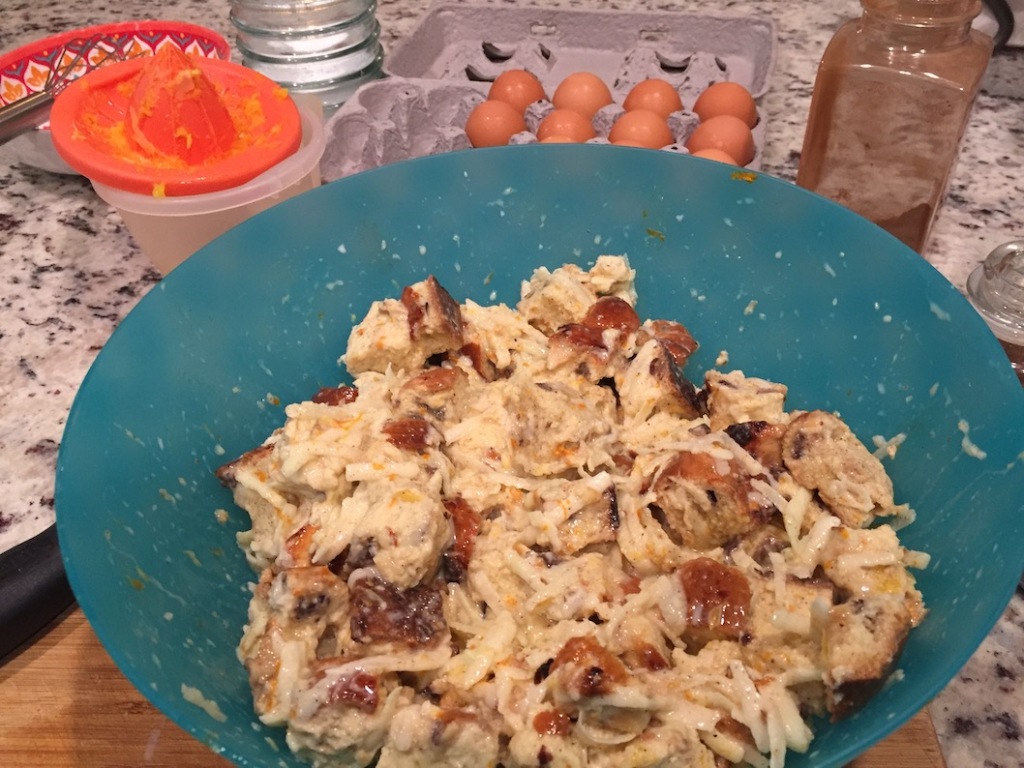
Pour the liquid mixture into the bowl with the dry ingredients and, using your hands, mix it all well but gently, to make sure the spices and the orange zest are spread evenly.

Generously grease a 13 x 9 ovenproof baking dish with butter, then pour the contents of the bowl into the baking dish, and spread evenly.

While the bread is soaking the liquids, turn on the oven to 350F.

When the oven is ready, put in the bread pudding and bake for 30 minutes.

Enjoy the smells that come out of the oven!!! And later on the flavors, too!

The pudding can be served warm or at room temperature.

Jachnoon

Breakfast as we know it, takes a different turn on Saturday, for traditional Jews. Shabbat breakfast is almost always food that was cooked overnight in the oven or on low heat on the stove. Or it was entirely cooked before Shabbat and warmed up in the oven that is on all day. Nothing is freshly cooked. Not that it matters much. Most Shabbat breakfasts I’m familiar with are so yummy and special, that it makes me look forward to Shabbat, just to be able to enjoy these dishes.

Jachnoon is of a Jewish Yemenite origin, and was brought to Israel by Yemenite immigrants. It is a baked rolled dough with honey and butter. Being so well integrated into Israeli homes, Jachnoon is now considered an Israeli dish.

Jachnoon pot is a simple tin pot with no handles and a tight lid that wraps around the top of the pot. In the U.S you may find it in some Israeli/kosher stores. However, any ovenproof pot with a lid, about 2.5 quarts in size, is good.

1kg (2 ¼lb) all-purpose white flour
120g (5oz) honey
4 tsp salt
3 cups water
½ cup oil
200g (8oz) very soft butter

In a mixer bowl, mix flour, honey, and salt, using a spoon. Add two cups water, give another stir with the spoon, then mix for about 3 minutes, using the hook attachment, to form a smooth, soft dough. The dough should not be firm, it should sag. If the dough is dry or stiff, add another ½ – 1 cup water.

Cover a large tray with oil. Divide the dough into 12 pieces by pulling dough the size of a small apple (with oiled hands) and pinching it off the large dough mass, one piece at a time. Knead each piece in your hands into a ball, then place it on the oiled tray after rolling the ball in the oil. You may need more than one tray to accommodate all the balls. Cover the dough with plastic wrap and let them rest for 30 minutes.

Jachnoun balls resting

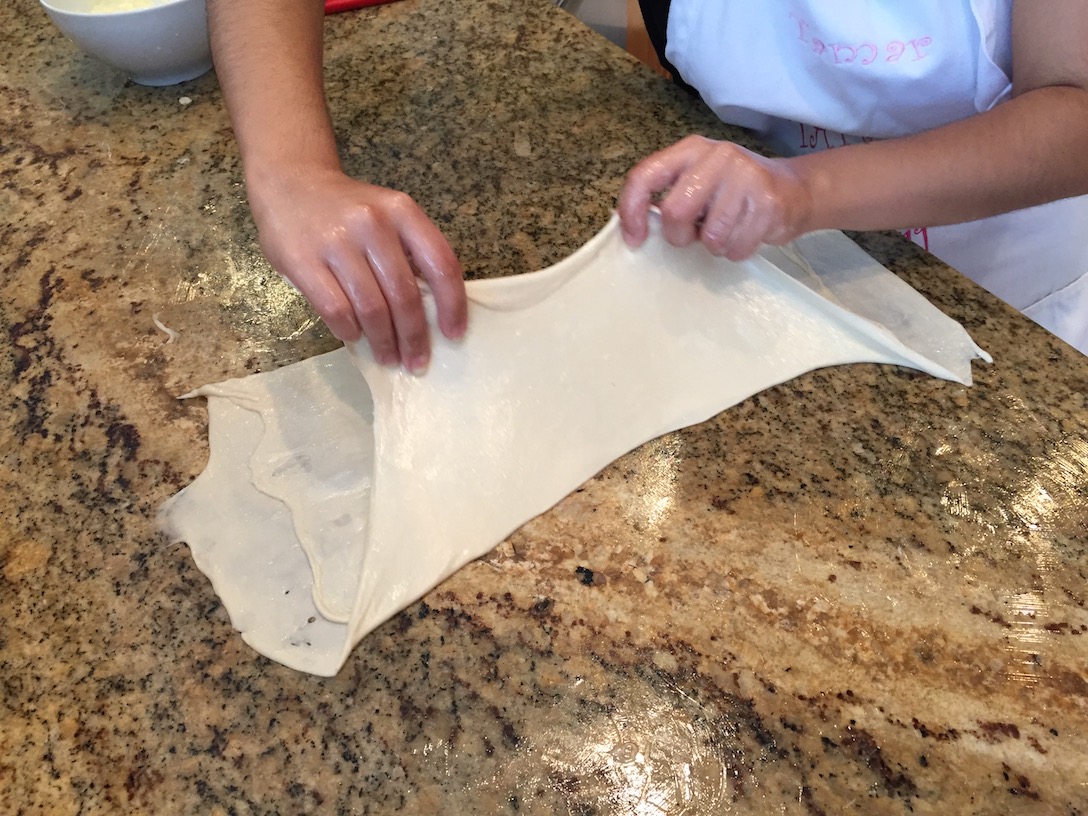
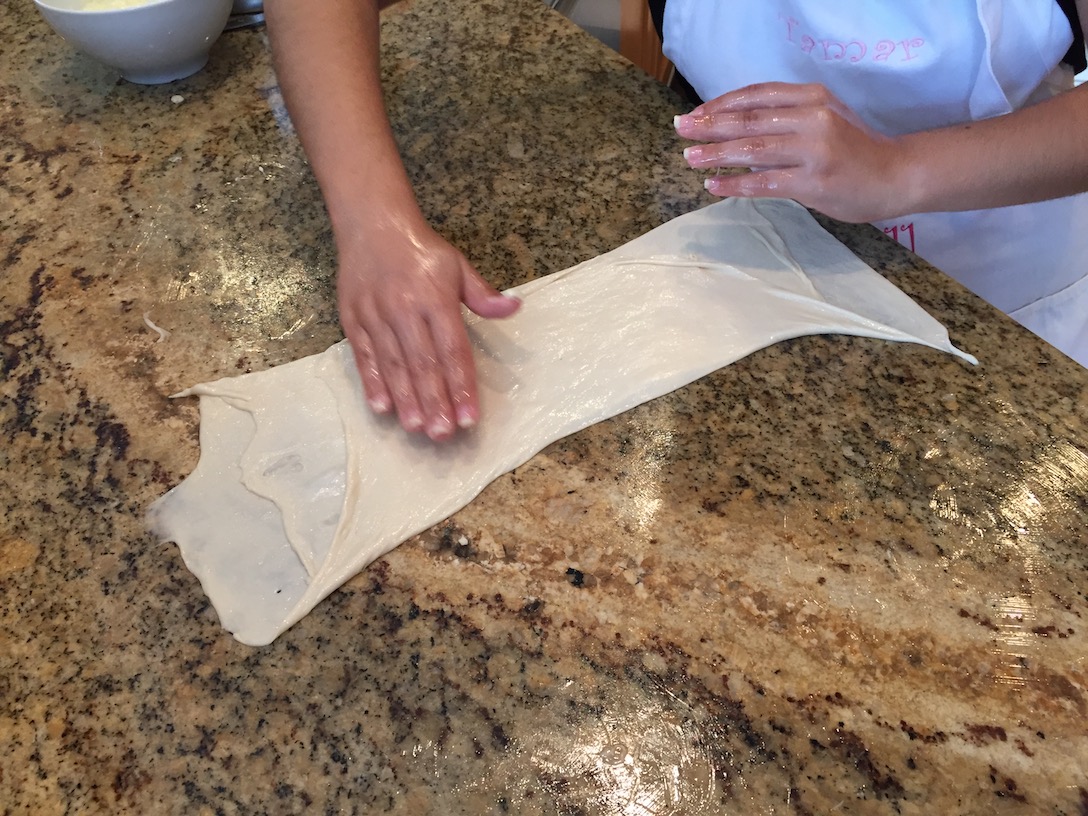
Generously butter a work surface. Place one of the dough balls on the buttered surface. Use a rolling pin to roll out the dough, then keep spreading it outward using your hands, and open it to form a paper-thin, round shape. Using your hand, spread about one tablespoon very soft butter on the stretched dough.

Fold the right side of the dough to the middle, then fold the left side on top of the right one (like an envelope). Do not worry if you have some holes in the dough. You will end up with a long strip of folded dough. Butter the top of the strip.

Starting at the bottom, roll the strip of dough upwards while slightly pulling the edges outwards.

Place the rolled dough on the bottom of the pot adjacent to the wall. Repeat the process with the other balls and arrange them close to one another in one layer in the pot. When the first layer is full, cover it with parchment paper and create a second layer on top.

Optional: If you have room left in the pot after placing in all the rolls, you can add eggs. Wrap about 5-6 eggs in tinfoil. Cover the Jachnoon with parchment paper, then place the wrapped eggs on top. Cover the pot with the lid. No room left in the pot for the eggs? No worries. Place the tinfoil wrapped eggs on the oven wire next to the Jachnoon pot. Just make sure the eggs are well sealed in the tinfoil, to avoid steam from escaping.

Preheat oven to 220F. Place in the Jachnoon pot and the eggs in the oven before you go to bed and bake overnight (10-12 hours).

Jachnoun ready

Serve it the following day for brunch, with a nicely browned egg, grated fresh tomato salted, and spicy z’houg.

For the Jachnoon to taste best, eat it with your hands!!!

Jachnoun served

Homemade Corn Tortillas

When we go out to eat, we’re always on the look-out for small Mom and Pop, hole-in-the-wall places where the food is authentic and usually of a much better quality than the big chains. However, unfortunately for us, although we may very much enjoy the meal, we can’t stop thinking that we could easily make some of the dishes at home and they would taste just as good. And when we try at home, and the dish actually comes out the way we like them, we don’t feel the need to eat out anymore (unless I don’t feel like working). Sometimes it feels like shooting myself in the foot…

When it comes to Mexican food, which we all love, there are some staples that we’ve already mastered at home, such as guacamole, salsa, and pico de gallo, and our own bean, fish, and meat fillings for tacos. Thank God there is so much more to Mexican food than just tacos. It gives us a reason to leave the house and enjoy other dishes that we don’t make at home. Until recently, the only obstacle to having our own perfect taco dinner at home were good corn tortillas. All the store-bought corn tortillas I’ve tried aren’t as good as the tortillas you get at decent Mexican restaurants. So I decided to try and make corn tortillas at home.

I prepared in advance for making tortillas at home and picked a day when I wasn’t super busy, thinking it would be a big project. But it wasn’t. I used Bob’s Red Mill masa harina, and followed the recipe on the back of the bag. It was so easy to make and we enjoyed it so much, that I have decided to make it more often.

I made a double batch, planning on freezing or refrigerating some of the tortillas for another time, but before I knew it, they were all gone. Even my youngest son, who would not touch store bought tortillas, had three of them and asked for more. Success!

Just a side note – when I tried to make tortillas again, I bought masa harina at a Mexican grocery, thinking that it would probably taste better than Bob’s Red Mill. I was wrong. Not only didn’t it taste better, but also it was stickier and harder to work with. So I’m back to Bob’s Red Mill. The recipe here works for this flour. If you buy masa harina of a different brand, follow the instructions on the package instead, for best results.

Corn Tortillas – makes 12 tortillas

Ingredients:
2 cups Golden Masa Harina Corn Flour
1/2 tsp Sea Salt
1-1/2 to 2 cups Hot Water

Preparation:
Mix salt into the masa harina corn flour. Slowly pour the water into the dough to get a good consistency. The dough should be firm and springy when touched, not dry or sticky. Let rest for about an hour, covered.

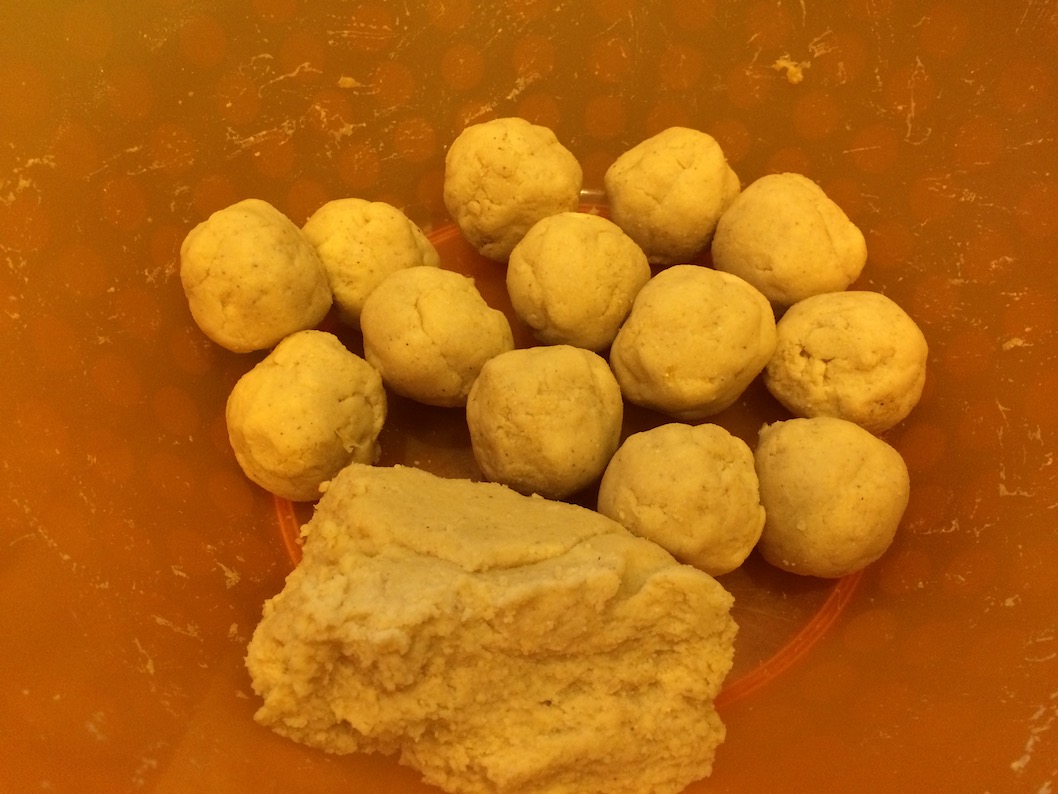
tortilla balls

Preheat a griddle or a cast iron pan. Divide the dough into 2 inch balls.

Press each dough ball between two pieces of waxed paper. You can either use a tortilla press, or if you do not have one, use a heavy skillet or a heavy dish instead. Just make sure that your ball of dough is placed between two pieces of wax paper so that it doesn’t stick to the dish or the work surface.

tortilla flattening

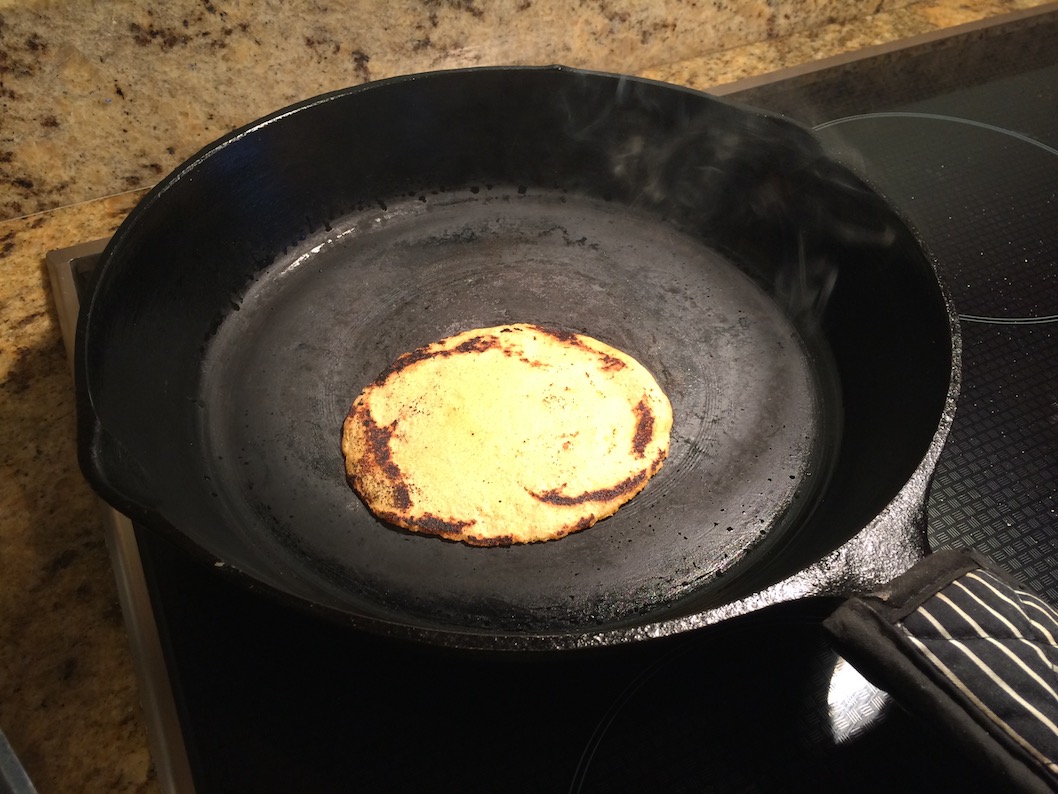
Place the flattened dough on a hot griddle or in a heavy pan, and cook until the top of the tortilla starts to look cooked, about 30-45 seconds. Flip to the other side and heat for a few seconds.

tortilla cooking
tortilla pile

Pile the tortillas on a plate, and cover with a towel. Serve them warm with your favorite variety of fillings such as grilled fish, sautéed ground beef, refried beans, guacamole, pico de gallo, etc. Corn tortillas tend to dry very quickly, so you should eat them while they are still fresh and warm, or place them in a sealed bag and freeze.

Challah Bread

Challah is a Jewish bread eaten every week on the Jewish Sabbath and on Jewish Holidays. In recent years, however, Challah was “discovered” by many Americans, and started showing up in recipes such as French toast. I used to buy our weekly Challah at the local supermarket, until… Doron found this wonderful Challah recipe about two years ago, when he was surfing the net http://www.chowhound.com/recipes/challah-29091.

We’ve tried a few other recipes before, but were never committed to baking Challah at home, until we discovered this recipe. It has since become our ultimate Challah recipe (until we find an even better one).

And yet, the eternal winger, aka me, just couldn’t resist making some small changes even to this wonderful recipe. I didn’t really change the ingredients, but I simplified the process… I don’t think it compromised the end result, though. You are welcome to compare.

Ingredients:

1 cup warm water (about 105°F to 115°F)
2 (1/4-ounce) packets active dry yeast (4 1/2 teaspoons)
½ teaspoons sugar
1 large egg, lightly beaten
2 large egg yolks, lightly beaten
1/4 cup vegetable oil, plus more for coating the bowl
1/4 cup sugar
4 to 4 1/2 cups all-purpose or bread flour
2 teaspoons fine salt
1 large egg, beaten
1 tablespoon water

Preparation:

Place the yeast in a mixer bowl and add the warm water, and ½ teaspoon of sugar. Give it a stir and let the yeast develop for 5 minutes.

Add to the bowl the flour, eggs, sugar and salt. Using the mixer’s spiral dough attachment, mix the ingredients until the dough just starts to form. Add the oil and continue kneading the dough on low speed for 5 -7 minutes, until the dough detaches from the bowl’s wall, but still sticks to the bottom. If the dough is too sticky, add 2 tablespoons of flour and knead for one more minute.

Grease a large bowl with 1 teaspoon of oil. Transfer the dough into the greased bowl, cover the bowl with a clean towel, and leave in a warm place until the dough doubles in volume.

challah dough in bowl

Divide the dough into two equal pieces. Divide each half into 3 balls. Make a long string of dough (a snake) out of each ball. You can use your hands to roll the dough back and forth, on a lightly floured surface, while also pushing it outwards to both sides.

Challah roll out dough

The other way to create a dough snake is to hold the dough in your hands, squeezing and massaging it vertically. This way you use gravitation to help pull the dough down and thus elongate it. Every once in awhile turn the dough upside down, so that the snake is about the same width on both ends.

challah squeezing snake

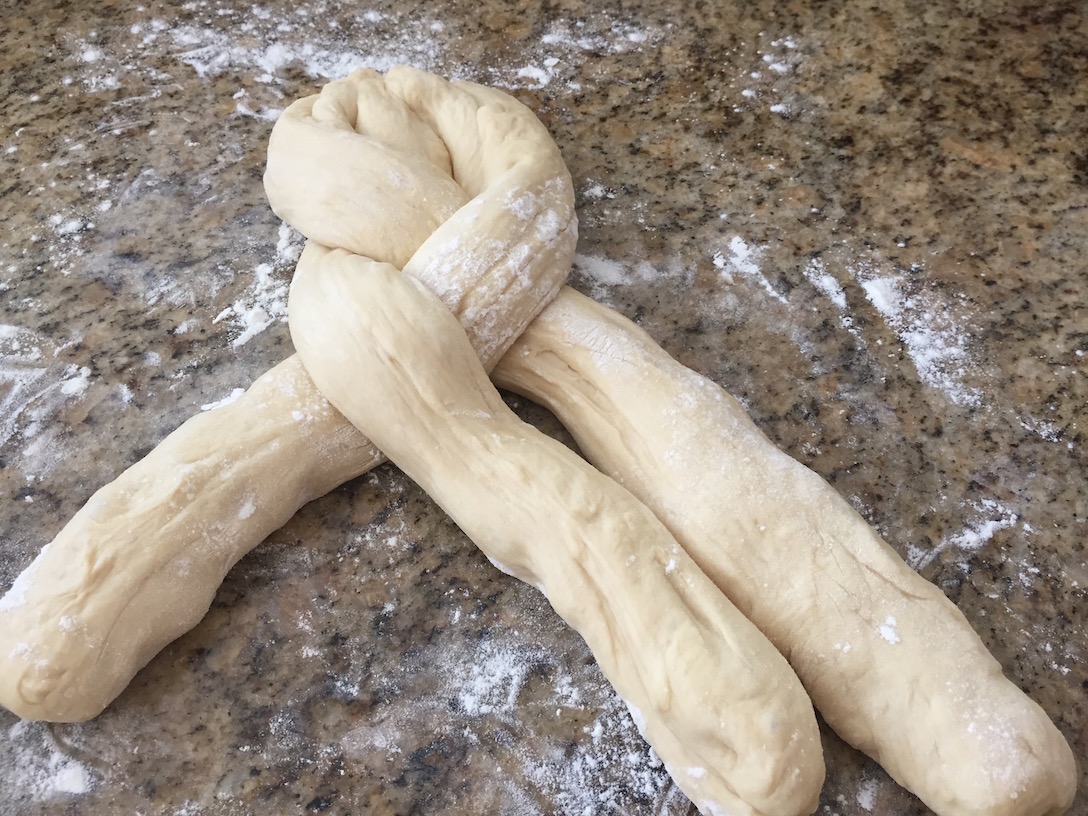
Once you have three snakes ready, lay them on the work surface vertically to you and horizontally to each other. Connect the top ends of the snakes, then braid the snakes gently all the way to the bottom.

challah snakes

Do not pull the snakes while braiding them, only fold them into place. Connect the bottom ends of the snakes and fold it underneath.

Challah snakes braided

challah braided

Gently pick up the Challah from the work surface and place it on a baking sheet covered with parchment paper.

Repeat the process with the rest of the dough to make a second Challah. Cover the Challahs with a towel and leave in a warm place for a second rise.

Preheat the oven to 350F.

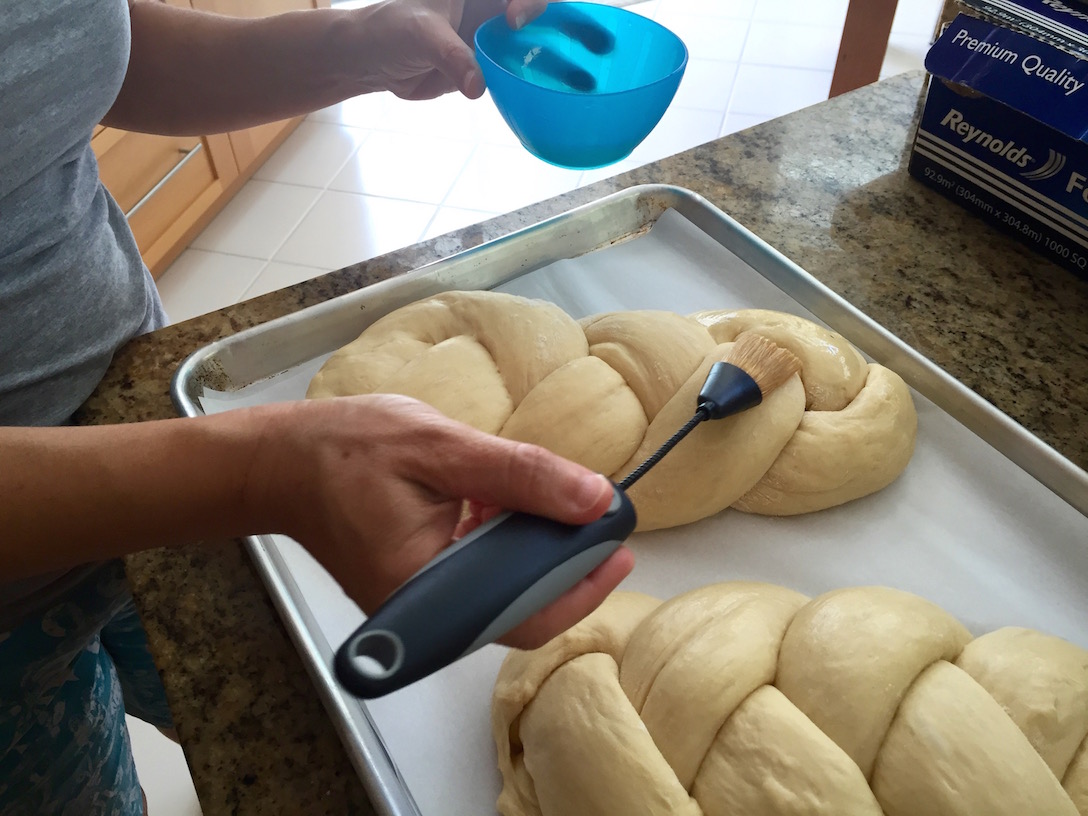
Right before placing the Challahs in the oven, make an egg wash using one beaten egg and 1 tablespoon of water. Using a brush, brush the egg wash over the top of the Challah to give it a shine.

Challah brushing egg wash

Place the Challahs in the oven and bake for about 20-25 minutes. Challah is ready when it makes a hollow sound when you knock on it. If you are not sure, insert a knife in one of the seams, in the middle of the Challah, and see if it comes out sticky or dry.

Remove from the oven and from the baking sheet, and place on a cooling rack to cool. If you leave the Challah to cool on the baking sheet, the bottom will get soggy.

You may freeze one of the Challahs to save it for another time. In our house it rarely happens. We finish both Challahs in one weekend.

challah close up